
The Rightmove First-Image Checklist Every Estate Agent Needs
Your Rightmove first image decides whether buyers click or scroll past. Use this practical checklist to choose, shoot and edit hero photos that win attention in under three seconds.
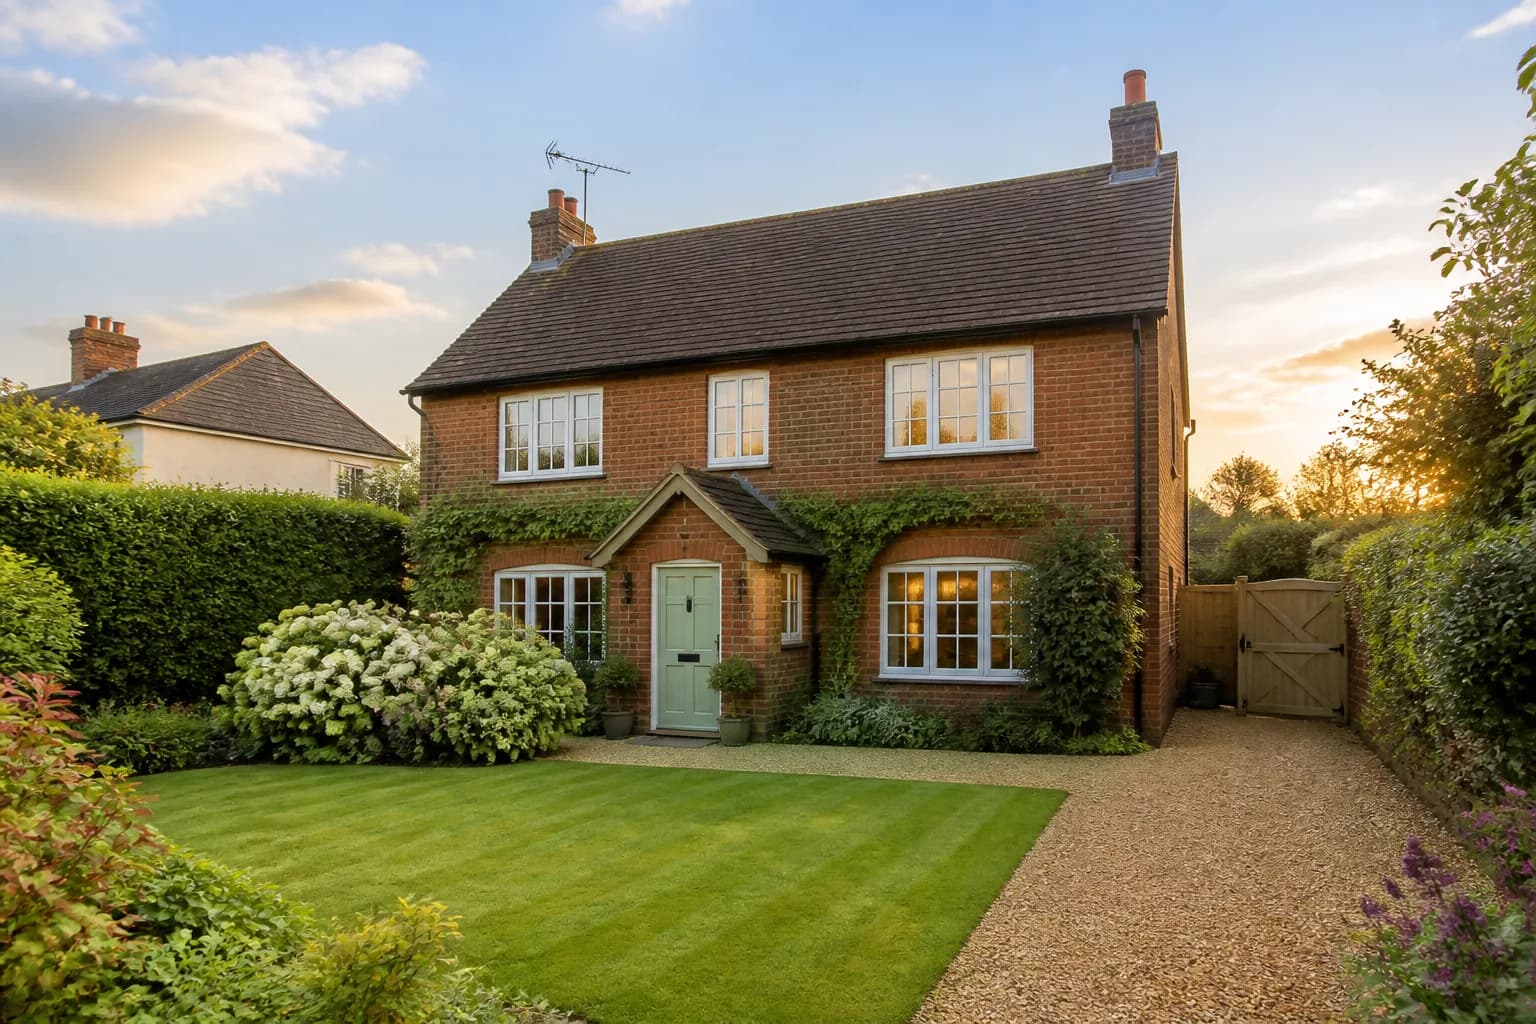
Key Takeaways
- Portal browsers judge listings in under three seconds — the first image does most of that work.
- Lead with the strongest exterior or hero room, never a weak side angle or cluttered detail.
- Level horizons, clean foregrounds and honest light outperform heavy filters.
- Declutter and enhance before you publish; do not rely on the caption to explain a messy shot.
- Build a repeatable first-image standard across every branch so quality never depends on who uploaded the listing.
On Rightmove, Zoopla and every other property portal, the first image is not decoration. It is the advert.
Buyers do not read your full description before they decide to click. They glance at a thumbnail, form an impression, and move on — or open the listing. That decision often happens in under three seconds. If your hero photo is dark, crooked, cluttered or oddly cropped, the rest of your marketing package never gets a chance.
This checklist is built for UK estate agents and photographers who need a repeatable standard, not a one-off “nice photo” when someone has time. Pair it with better shooting habits from how estate agents can create better property photos and you will win more clicks from the same stock of instructions.
Why the first image decides the click
Portal search pages are competitive. A three-bed semi in a popular postcode may sit beside dozens of similar homes. Differentiation starts with visual clarity:
- Is the property easy to identify?
- Does it look looked-after?
- Can the buyer imagine living there?
- Does the image feel professional enough to trust the agent?
A strong first image answers yes to all four without a caption. A weak one forces buyers to work — and busy buyers rarely work.
The three-second test
Before you publish, shrink the hero image to thumbnail size on your phone. Ask:
- Can I tell what I am looking at? House, flat exterior, living room — instantly.
- Is anything distracting? Wheelie bins, cars, cables, laundry, agent boards cutting the frame.
- Is the light friendly? Midday glare, muddy shadows and yellow indoor casts all reduce clicks.
- Is the geometry honest? Vertically leaning walls and tilted horizons signal amateur work.
- Would I stop scrolling? If you would not, neither will a buyer.
If any answer fails, fix the image or choose a different lead.
Rightmove first-image checklist
1. Choose the right subject
Lead with the strongest selling story:
- Houses: clean front elevation, or rear elevation if that is where the value lives (garden, extension, view).
- Flats: best principal room, or a flattering exterior if the block and entrance support the price point.
- New builds: show home or the plot’s most complete, staged-looking interior — empty shells rarely win the thumbnail battle.
- Period homes: character detail only works as image one if it also shows usable space; a close-up of a fireplace alone usually underperforms.
Never lead with a utility room, landing, garage interior or a partial room that needs explanation.
2. Get the composition right
- Keep the camera height natural — roughly chest height for exteriors, slightly lower for rooms to show floor and ceiling balance.
- Leave a little breathing room around the building; do not crop through chimneys, roof lines or sofa arms.
- Prefer a straight-on or gentle three-quarter angle over extreme wide distortion.
- For gardens, show the relationship to the house when possible so buyers understand scale.
3. Prioritise light over drama
Bright, even light sells more homes than moody contrast. Shoot exteriors in soft daylight when you can. For interiors, open blinds, turn on practical lights and expose for the room buyers will live in — not the blown-out window alone. HDR property photography helps balance bright windows and darker corners without making rooms look artificial.
4. Declutter before you publish
Clutter is the fastest way to kill a first impression. Remove or digitally clear:
- Bins, recycling and garden waste
- Cars blocking the facade
- Personal photos, laundry and bathroom products
- Trailing cables and temporary furniture piles
Tools such as PhotoClear make ethical decluttering fast when a reshoot is not possible. Keep changes honest: remove temporary mess, do not invent a different property.
5. Straighten, crop and colour-correct
Before upload:
- Level the horizon
- Correct verticals on exteriors where possible
- Crop to a portal-friendly framing that still reads at small sizes
- Neutralise colour casts so brick, grass and paint look true
PhotoEdit and your wider ReHub Studio workflow are enough for most listing polish without opening a heavyweight desktop editor for every instruction.
6. Match the image to the price point
A £250,000 terrace and a £1.5m riverside home both need clarity, but the hero should match expectations. Luxury listings can carry more atmospheric twilight or landscaped garden leads. Volume instructions need fast, clean, comparable daytime heroes that do not confuse portal browsers comparing similar homes.
7. Keep branch standards consistent
Write the rule down:
- Preferred first-image types by property category
- Minimum resolution and orientation
- Forbidden leads (toilets, meters, extreme close-ups)
- Who has permission to override the default
Inconsistency across branches makes your brand look uneven even when individual negotiators are trying hard.
Common first-image mistakes
The apologetic wide shot. So much pavement and sky that the house becomes a small object in the middle.
The weather excuse. Publishing a grey, wet facade as image one when a brighter existing angle exists deeper in the gallery.
The lifestyle prop overload. Balloons, stock “sold” vibes or staged clutter that ages instantly.
The filter flex. Heavy HDR halos, oversaturated lawns and orange interiors that look edited rather than inviting.
The wrong room. Leading with a dated bathroom because it was shot first in the sequence.
A practical upload workflow
- Select three candidate heroes from the shoot.
- Run the three-second phone test.
- Declutter and correct the winner.
- Compare against the best competing listings in the same search.
- Upload, then review the live thumbnail — not only the full-size preview in your CRM.
If the live thumbnail still feels weak, swap immediately. First-image changes are one of the highest-leverage edits you can make without spending more on media.
How this fits a modern media package
The first image gets the click. The gallery, floor plan, video and tour keep attention and convert enquiry. Think of the hero shot as the doorway to the rest of your property marketing stack — not a standalone trophy photo.
When your team can produce consistent heroes at speed, you protect instructions, improve portal engagement and make every later asset work harder.
Flats vs houses: thumbnail competition differs
Houses are often judged on facade clarity — buyers want to see roofline, garden context and parking. Flats compete on principal rooms and building presence when the exterior supports the asking price.
For flats, if the block exterior is undistinguished, a bright living space with visible windows and depth may outperform a shot of the communal entrance. For houses, leading with a living room when a clean front elevation exists usually underperforms in suburban searches where buyers filter by kerb appeal.
Leasehold listings add another layer: service charge and building condition are inferred from communal areas. If you include a hallway or entrance shot, ensure it reflects management standards — scuffed paint and post piles in frame hurt trust before the viewer reaches the kitchen gallery.
Test both candidates through the three-second rule and the competitor grid from what buyers notice in listing photos. The right hero is contextual, not universal.
Final checklist to print for the office
- Strongest subject chosen (not first shot on the card)
- Level, well-composed, readable at thumbnail size
- Clean foreground and no distracting clutter
- Bright, honest light
- Colour and geometry corrected
- Matches price point and property type
- Reviewed on a phone against local competitors
- Live portal thumbnail checked after upload
Nail those eight points and your listings start from a fair fight — often a winning one — before a buyer reads a single word of copy.
Frequently Asked Questions

The ReHub Studio Team
Property Marketing Experts
The ReHub Studio team builds AI-powered tools that help estate agents, photographers and developers create better property marketing, faster.
Ready to improve your property marketing?
Enhance photos, remove clutter, stage rooms, produce floor plans, create video and publish listings from one ReHub account.
Related Articles
Multi-Branch Agency Media Standards That Actually Stick
If every branch markets differently, your brand feels accidental. Build media standards that negotiators can follow — and that production can deliver at scale.

Estate Agent Social Media Property Content That Actually Gets Saved
Stop posting random listing photos into the void. Build a repeatable social content system from the assets you already create for portals and appraisals.

How Estate Agents Win Instructions with Better Media Packages
Vendors compare fees — and then they compare what you will actually produce. Here is how to turn photography, plans, video and microsites into a pitch that wins instructions.